AI Assistant for Chat
Using AI Assistants
AI Assistants help automate conversations in Transpond by answering common questions using your connected knowledge sources, website content, and support documentation. They can be used alongside Conversations and Chat to help visitors get answers faster while reducing repetitive work for your team.
Create an AI Assistant
- Open Conversations
- Go to AI Assistants
- Click Create Assistant
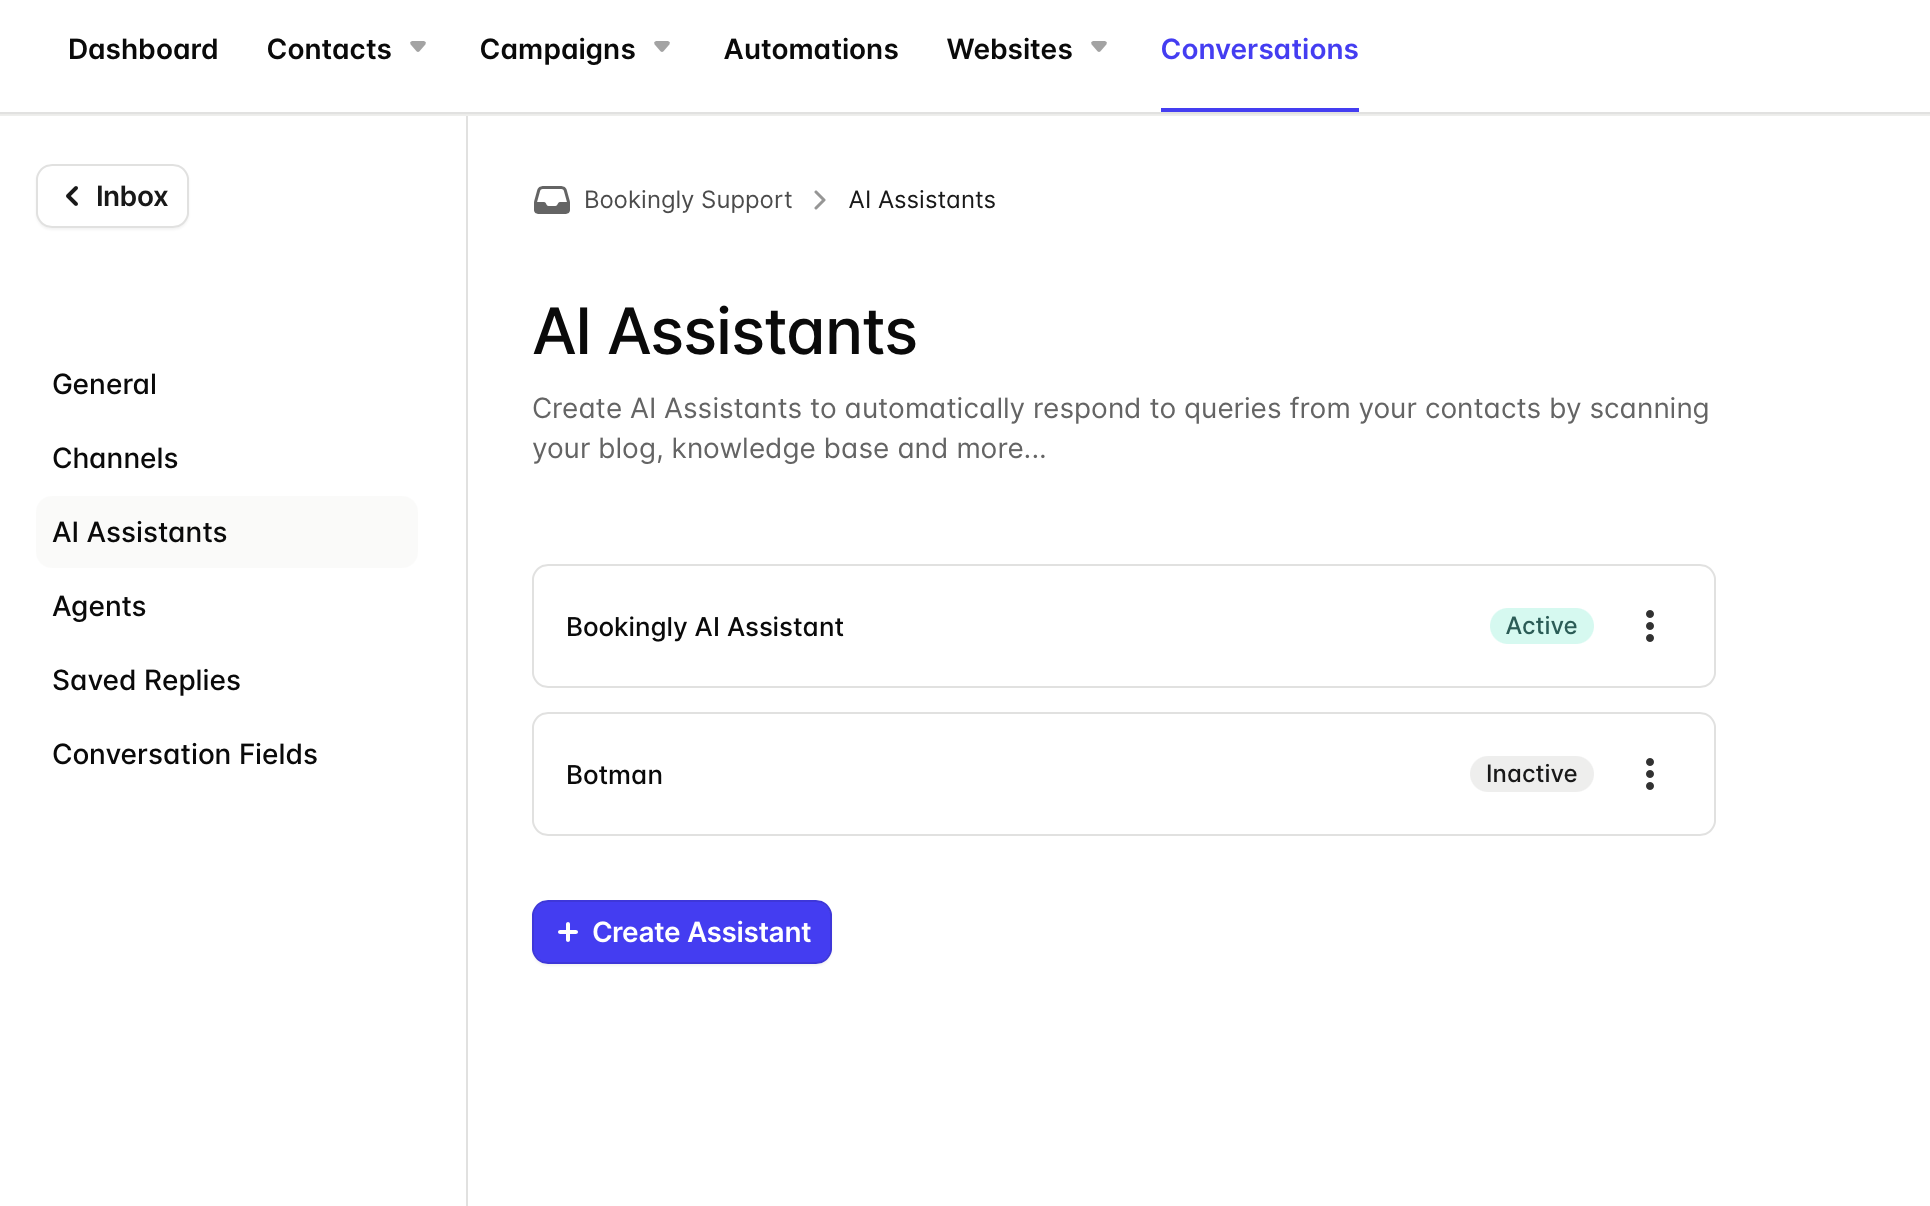
- Enter a name for your assistant
- Add a Source for your AI Assistant to learn from. If you have a Knowledge Base, Transpond can automatically scan and train the assistant using your existing articles. If you do not have a Knowledge Base yet, you can skip this step and manually add content later.
- Choose which Channels the AI Assistant should be connected to. Please note that each channel can only have one AI Assistant assigned to it.
- If you added a Source, Transpond will begin scanning and processing your content in the next step. Click Continue to complete setup. Content scanning will continue automatically in the background.
- After setup is complete, you’ll be taken to the AI Assistant dashboard, where you can review performance reports and monitor how your assistant is performing over time.
Once created, you can configure how the assistant responds and what content it can access.
Managing AI Assistant Sources
AI Assistant Sources are the websites and content your AI Assistant uses to learn and answer questions. These are typically knowledge bases, help centers, or blog articles.
You can manage your Sources at any time from the AI Assistant settings.
How to add a new Source
- Click your Inbox name in the top-left corner, then select AI Assistants
- Open your existing AI Assistant
- Go to the Sources tab
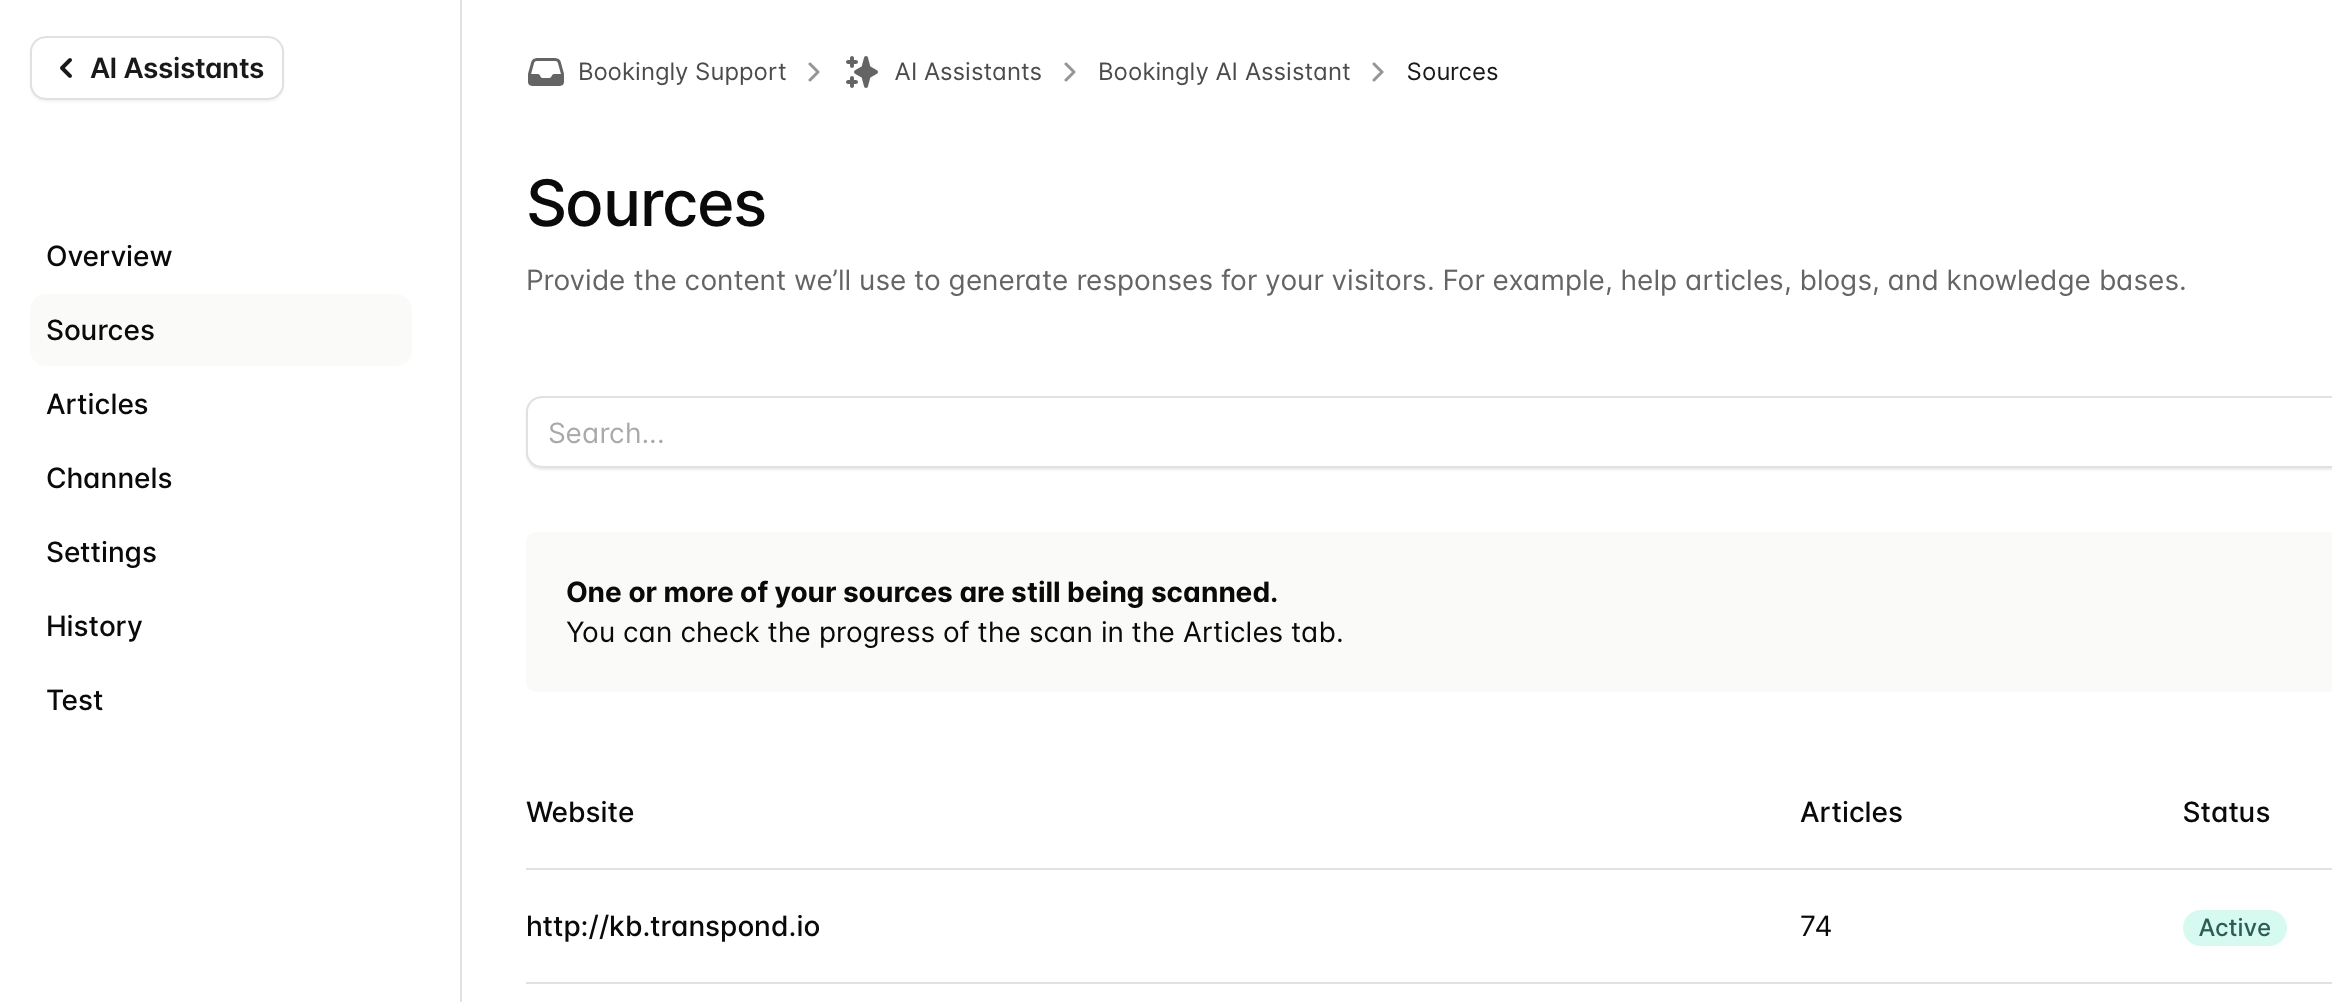
Here, you’ll see all current Sources connected to the AI Assistant.
- Click + Add Source
- Enter the URL for the knowledge base, help center, or blog you want the AI Assistant to learn from
- Transpond will automatically detect the Source type
- If the Source is supported, click Add Source
Once added, Transpond will begin scanning the content and learning from the available articles automatically. This process runs in the background, so you can leave the page while scanning completes.
You can only add sources from supported knowledge-base pages and blogs. If you come across a knowledge-base service that isn't supported, please email support@transpond.io and share it as a suggestion for future source support.
How to delete a source from the AI Assistant
- Click on your Inbox name in the top left corner > AI Assistants
- Click on your existing AI Assistant
- Go to Sources
- From here you can see a list of all current sources that your AI Assistant is learning from.
- Click the three little dots next to the source you want to remove > use the option to Delete Source.
Manage AI Assistant Articles
Once you’ve added a valid Source, Transpond will automatically scan the content and create a list of Articles for your AI Assistant to learn from.
You can manage these Articles at any time by refreshing updated content, editing articles manually, deleting articles you no longer want to use, or creating your own Manual Articles.
Update or delete an existing Article
- Click your Inbox name in the top-left corner, then select AI Assistants
- Open your existing AI Assistant
- Go to the Articles tab
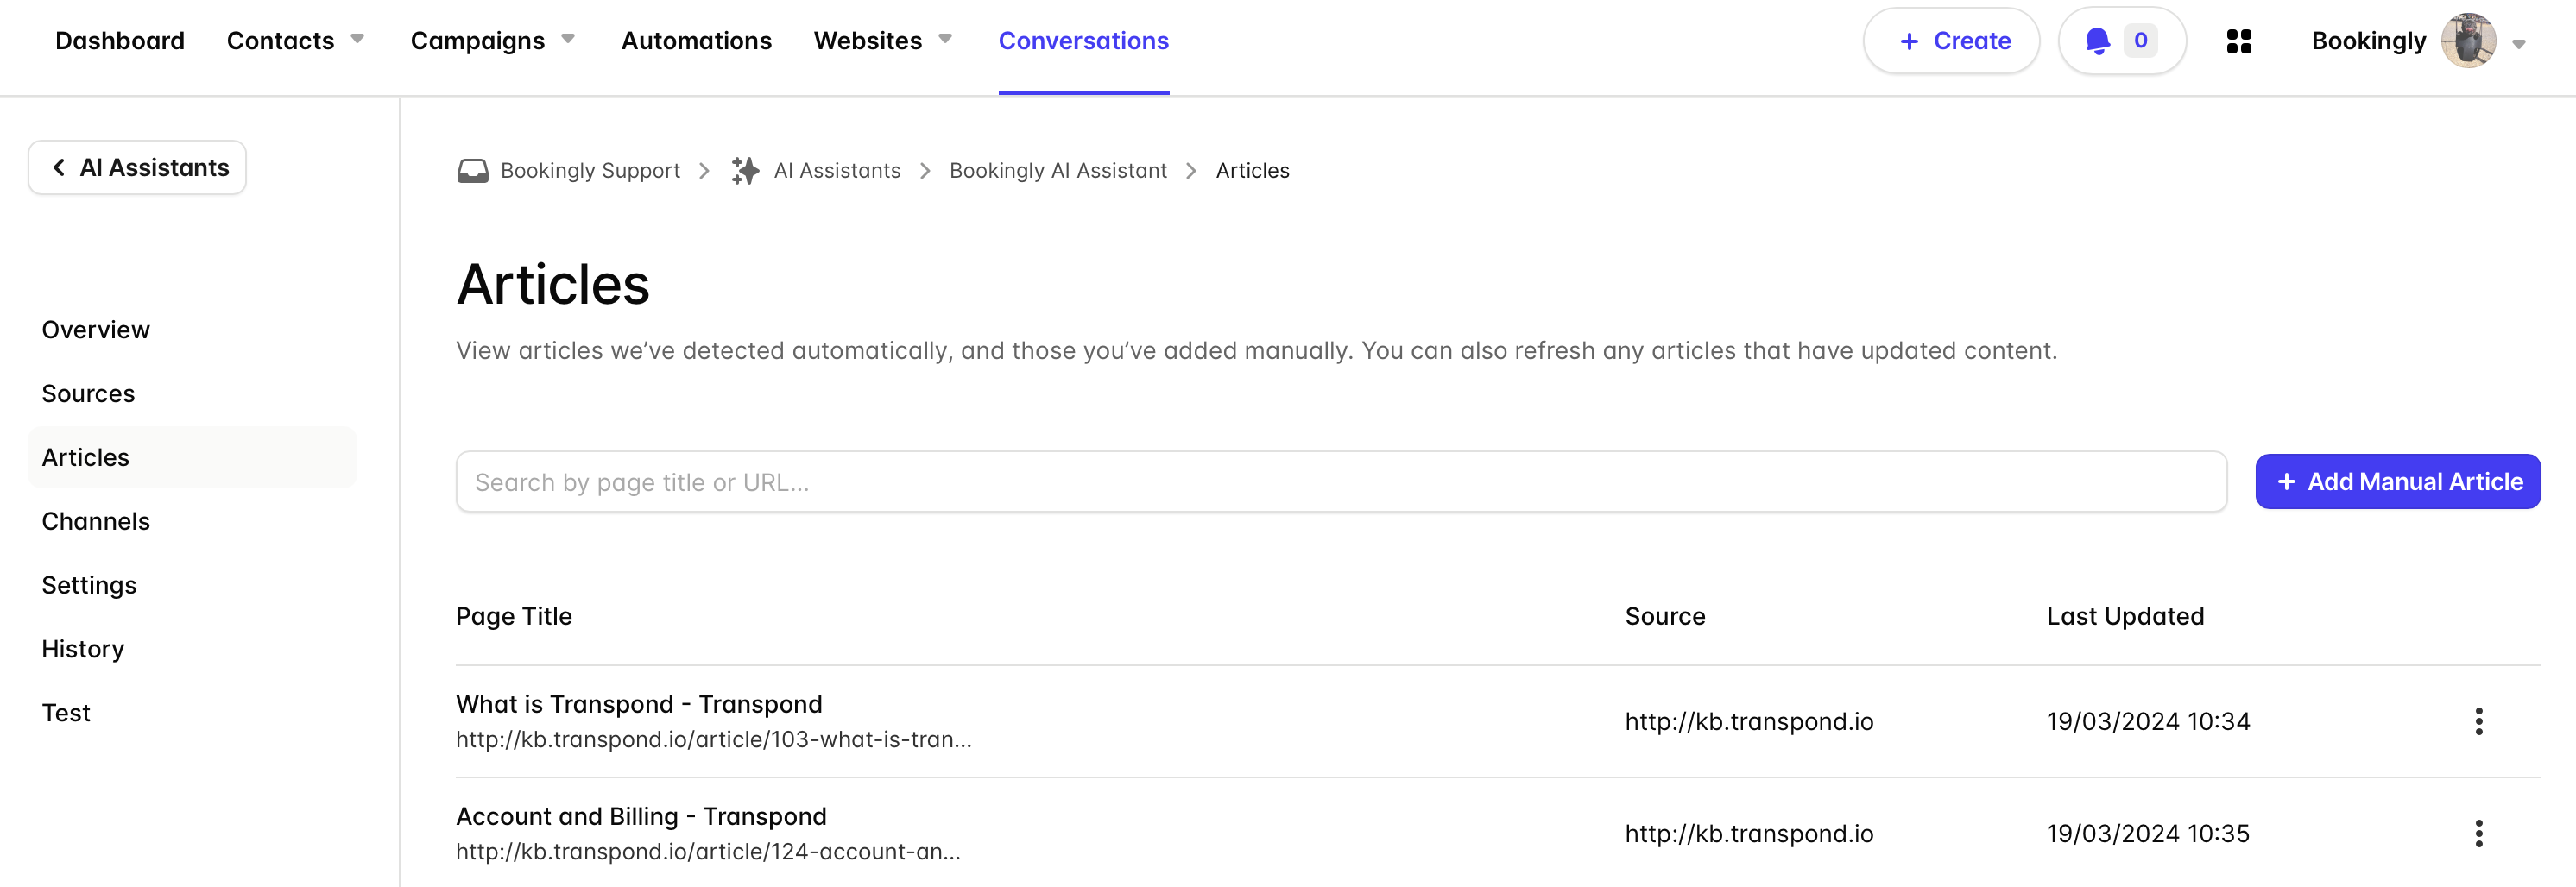
From here, you’ll see all Articles currently available to the AI Assistant.
- Click the three dots next to an Article
- Choose one of the following options:
- Refresh Article – re-scan the original Source for updated content
- Edit Article – manually update the Article content
- Delete Article – remove the Article from the AI Assistant
Add a Manual Article
Manual Articles let you create custom content for your AI Assistant that may not exist in your connected Sources.
- Click your Inbox name in the top-left corner, then select AI Assistants
- Open your existing AI Assistant
- Go to the Articles tab
- Click Add Manual Article
- Enter:
- A Title
- The Article Content
- An optional Source URL
If a Source URL is added, the AI Assistant can reference it when sharing information during conversations.
- Click Add Manual Article to save your changes
Your AI Assistant can now use this content when responding to conversations.
Configure and Test Your AI Assistant
This guide explains how to choose channels for your AI Assistant, configure its identity and messages, review its history, and test its responses.
Choose channels for your AI Assistant
You can decide which channels your AI Assistant is allowed to respond in. Each channel can only have one AI Assistant assigned.
To select channels:
- Click your Inbox name in the top-left corner, then select AI Assistants
- Open your existing AI Assistant
- Go to the Channels tab
- Check the box next to each channel you want the AI Assistant to use
- Click Save Channels
Your AI Assistant will now respond in the selected channels.
Configure name, avatar, and messages
You can customize how your AI Assistant appears and what it says to customers.
To update these settings:
- Click your Inbox name, then go to AI Assistants
- Open your existing AI Assistant
- Go to the Settings tab

From here you can update:
- Name – the name shown to customers in conversations
- Avatar – the image displayed alongside the assistant
- Default messages – automated messages such as greetings and initial replies (these can differ between Chat and Email)
Default messages are provided, but you can edit them to match your brand tone and customer experience.
- Click Save Settings
View AI Assistant history
The History section lets you review past AI Assistant responses.
To access history:
- Click your Inbox name, then go to AI Assistants
- Open your existing AI Assistant
- Go to the History tab
From here, you can view previous conversations and how the AI Assistant responded to customer questions.
Test your AI Assistant
The Test section lets you check how your AI Assistant responds before or after making changes to Sources or Articles.
To test your assistant:
- Click your Inbox name, then go to AI Assistants
- Open your existing AI Assistant
- Go to the Test tab
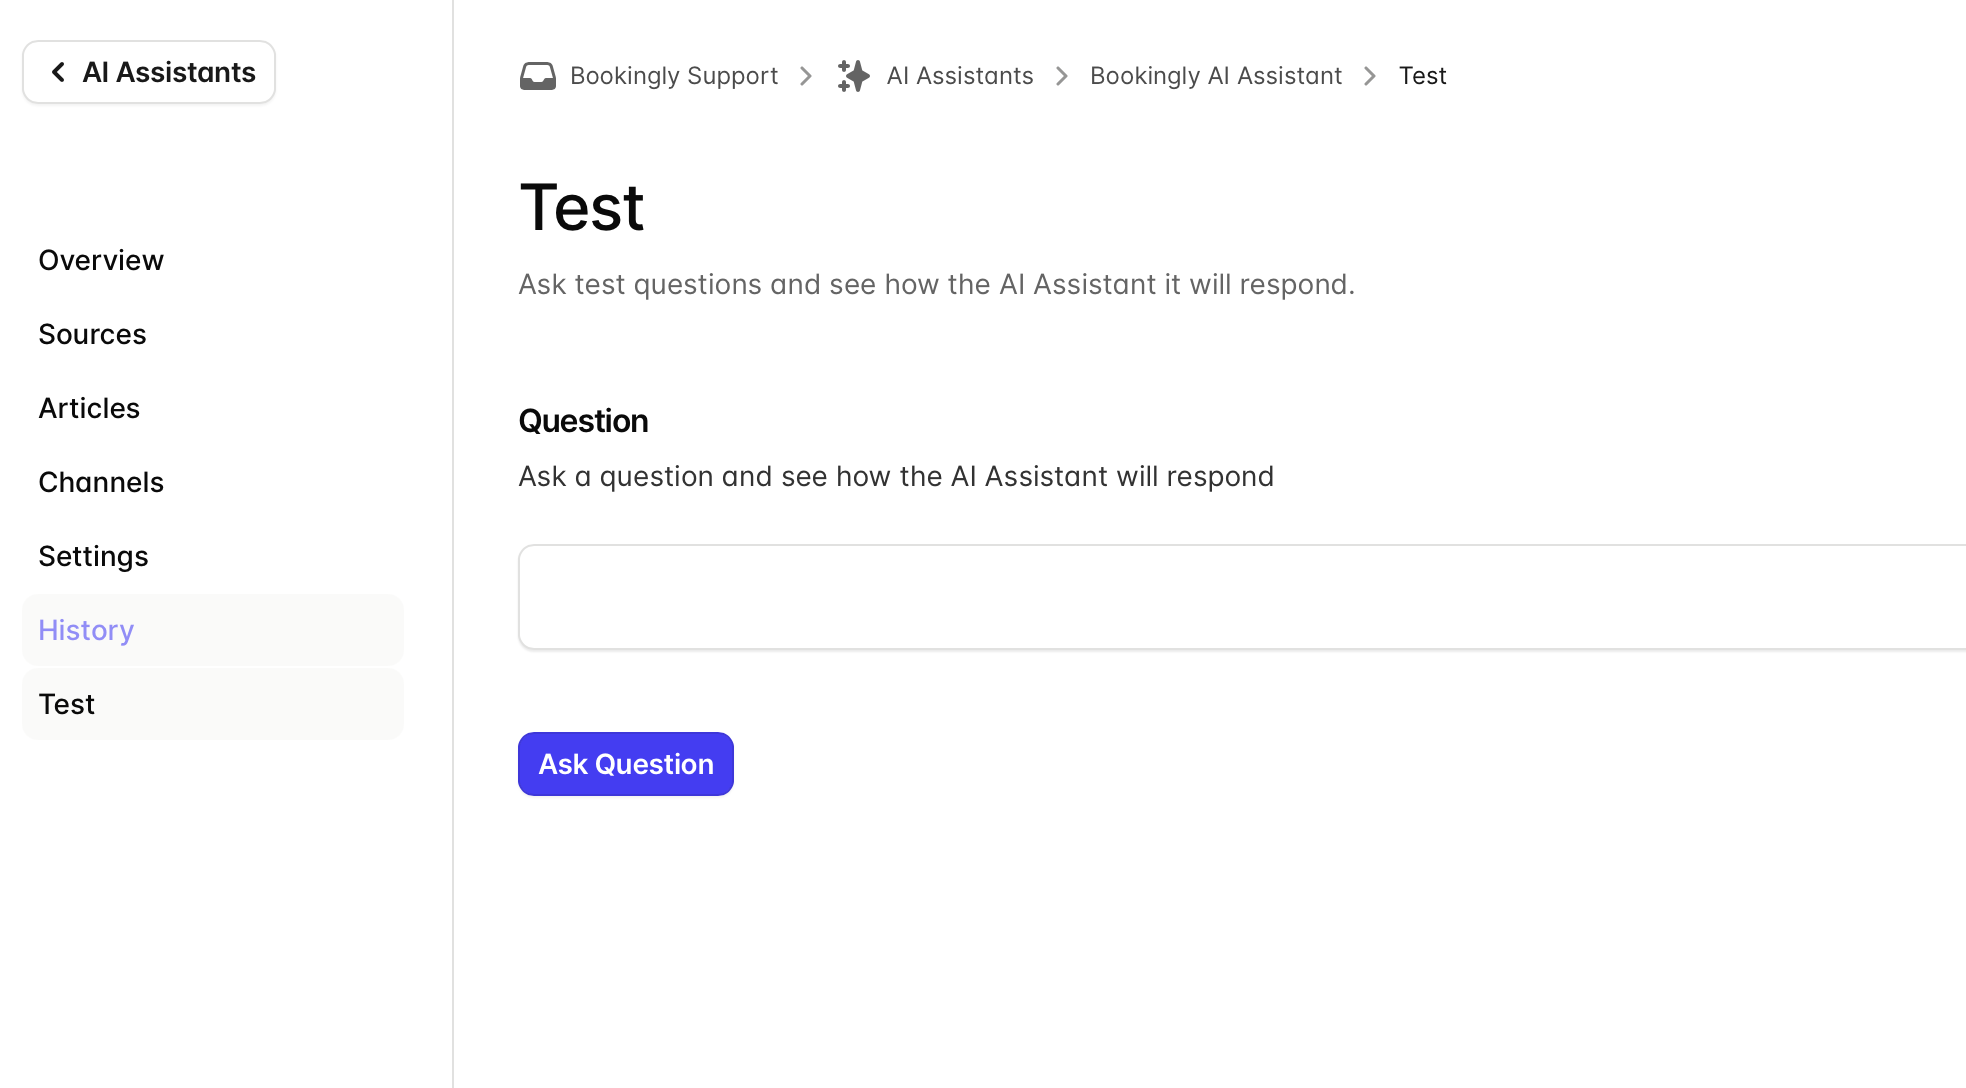
- Type a question as if you were a customer
- Click Ask Question
- Review the response
If the answer isn’t accurate or helpful, you can update your Articles or Sources and test again.
Testing regularly helps ensure your AI Assistant stays accurate and aligned with your latest content.
AI Assistant Best practices
- Keep instructions specific and clear
- Start with common support questions
- Regularly review assistant conversations
- Keep knowledge sources updated
- Escalate complex requests to human agents when needed