Configuring Conversations
Once your Conversations Inbox and Channels are set up, you can customize how your team manages conversations and how customers interact with your Chat and Email channels.
This guide covers the main configuration options available in Conversations.
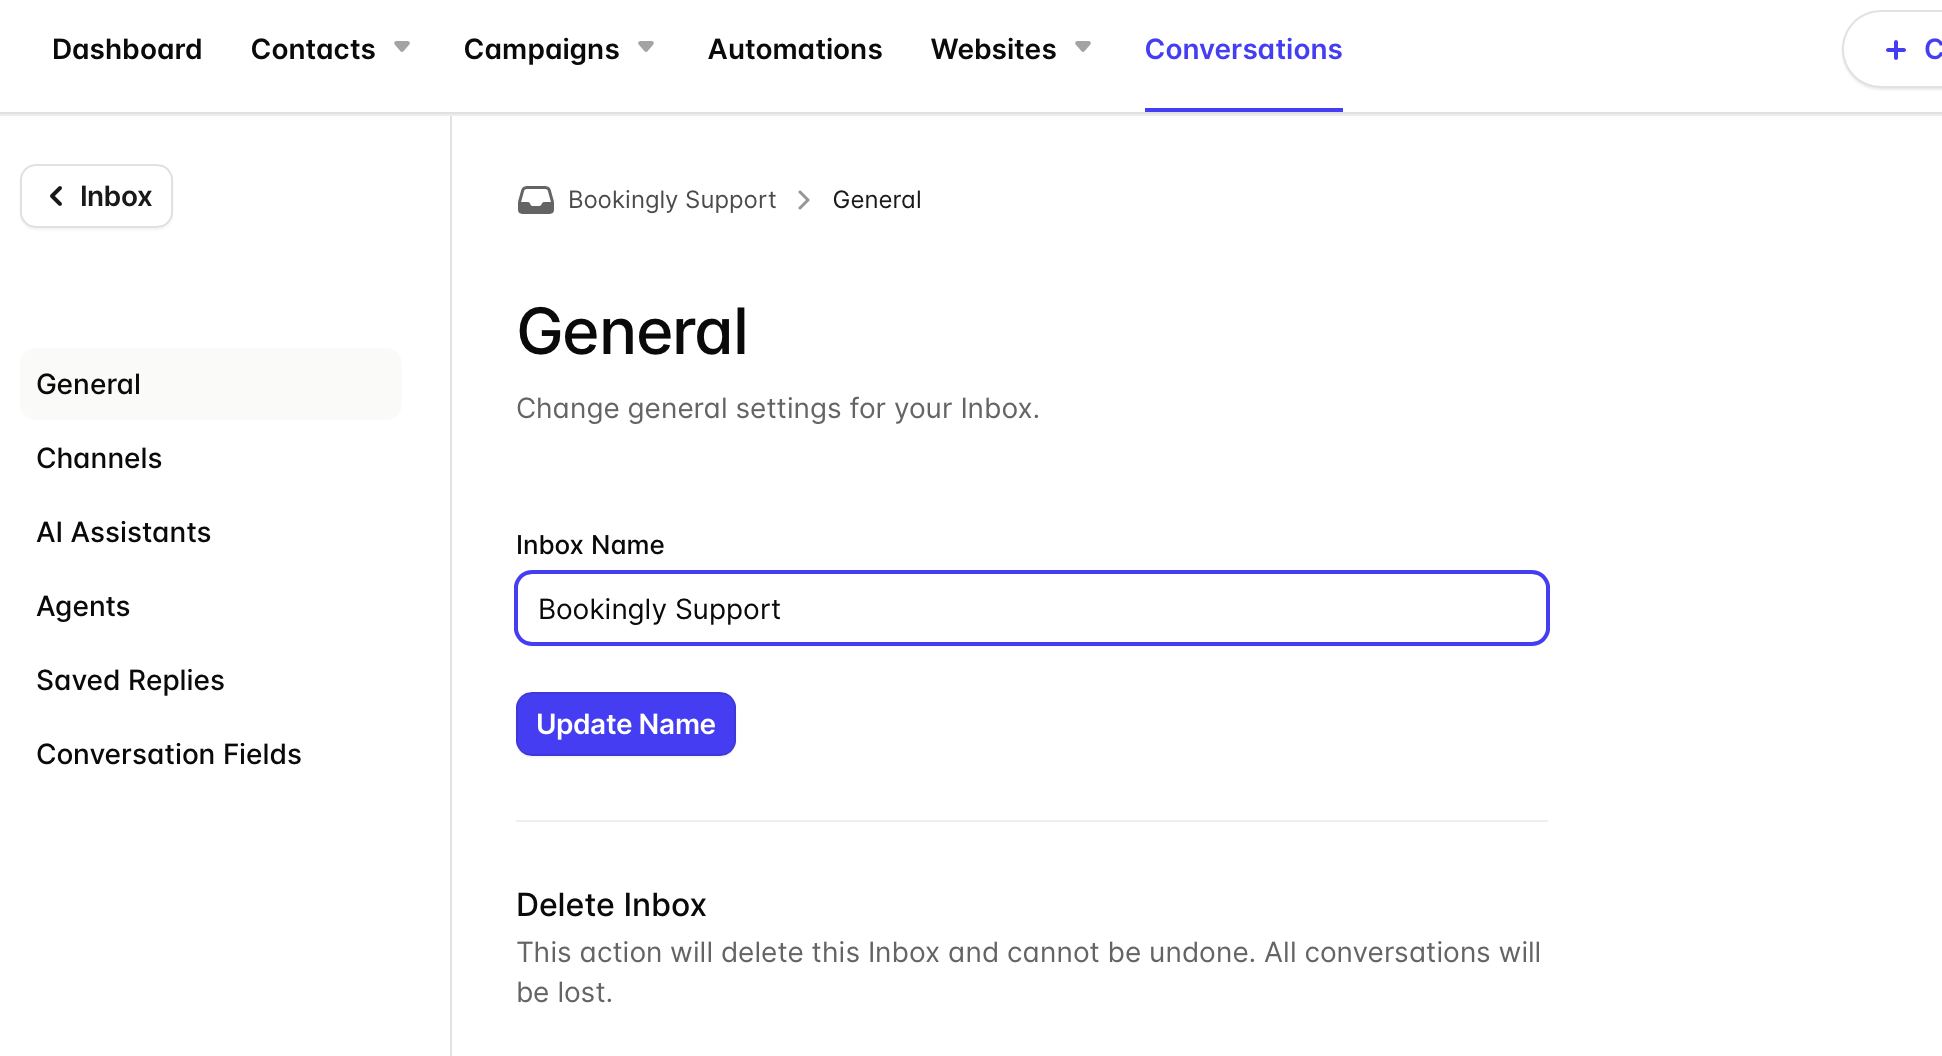
Change your Inbox name
Your Inbox name is used internally to help your team identify the correct Inbox. It is not visible to customers.
To update your Inbox name:
- Click your Inbox name in the top-left corner
- Go to General
- Update the Inbox name
- Click Update Name to save your changes
Configure your Email Channel
Email Channel settings allow you to manage forwarding addresses, aliases, and email signatures.
To configure an Email Channel:
- Click your Inbox name
- Go to Channels
- Select your Email Channel
- Open the Forwarding section to review your forwarding address and add any additional Aliases you want to forward emails from.
- Go to the Email Signature section to create a signature that will automatically be included on emails sent from your Inbox.
- Use Insert Merge Tags to add dynamic information such as the contact’s name or email address to your signature.
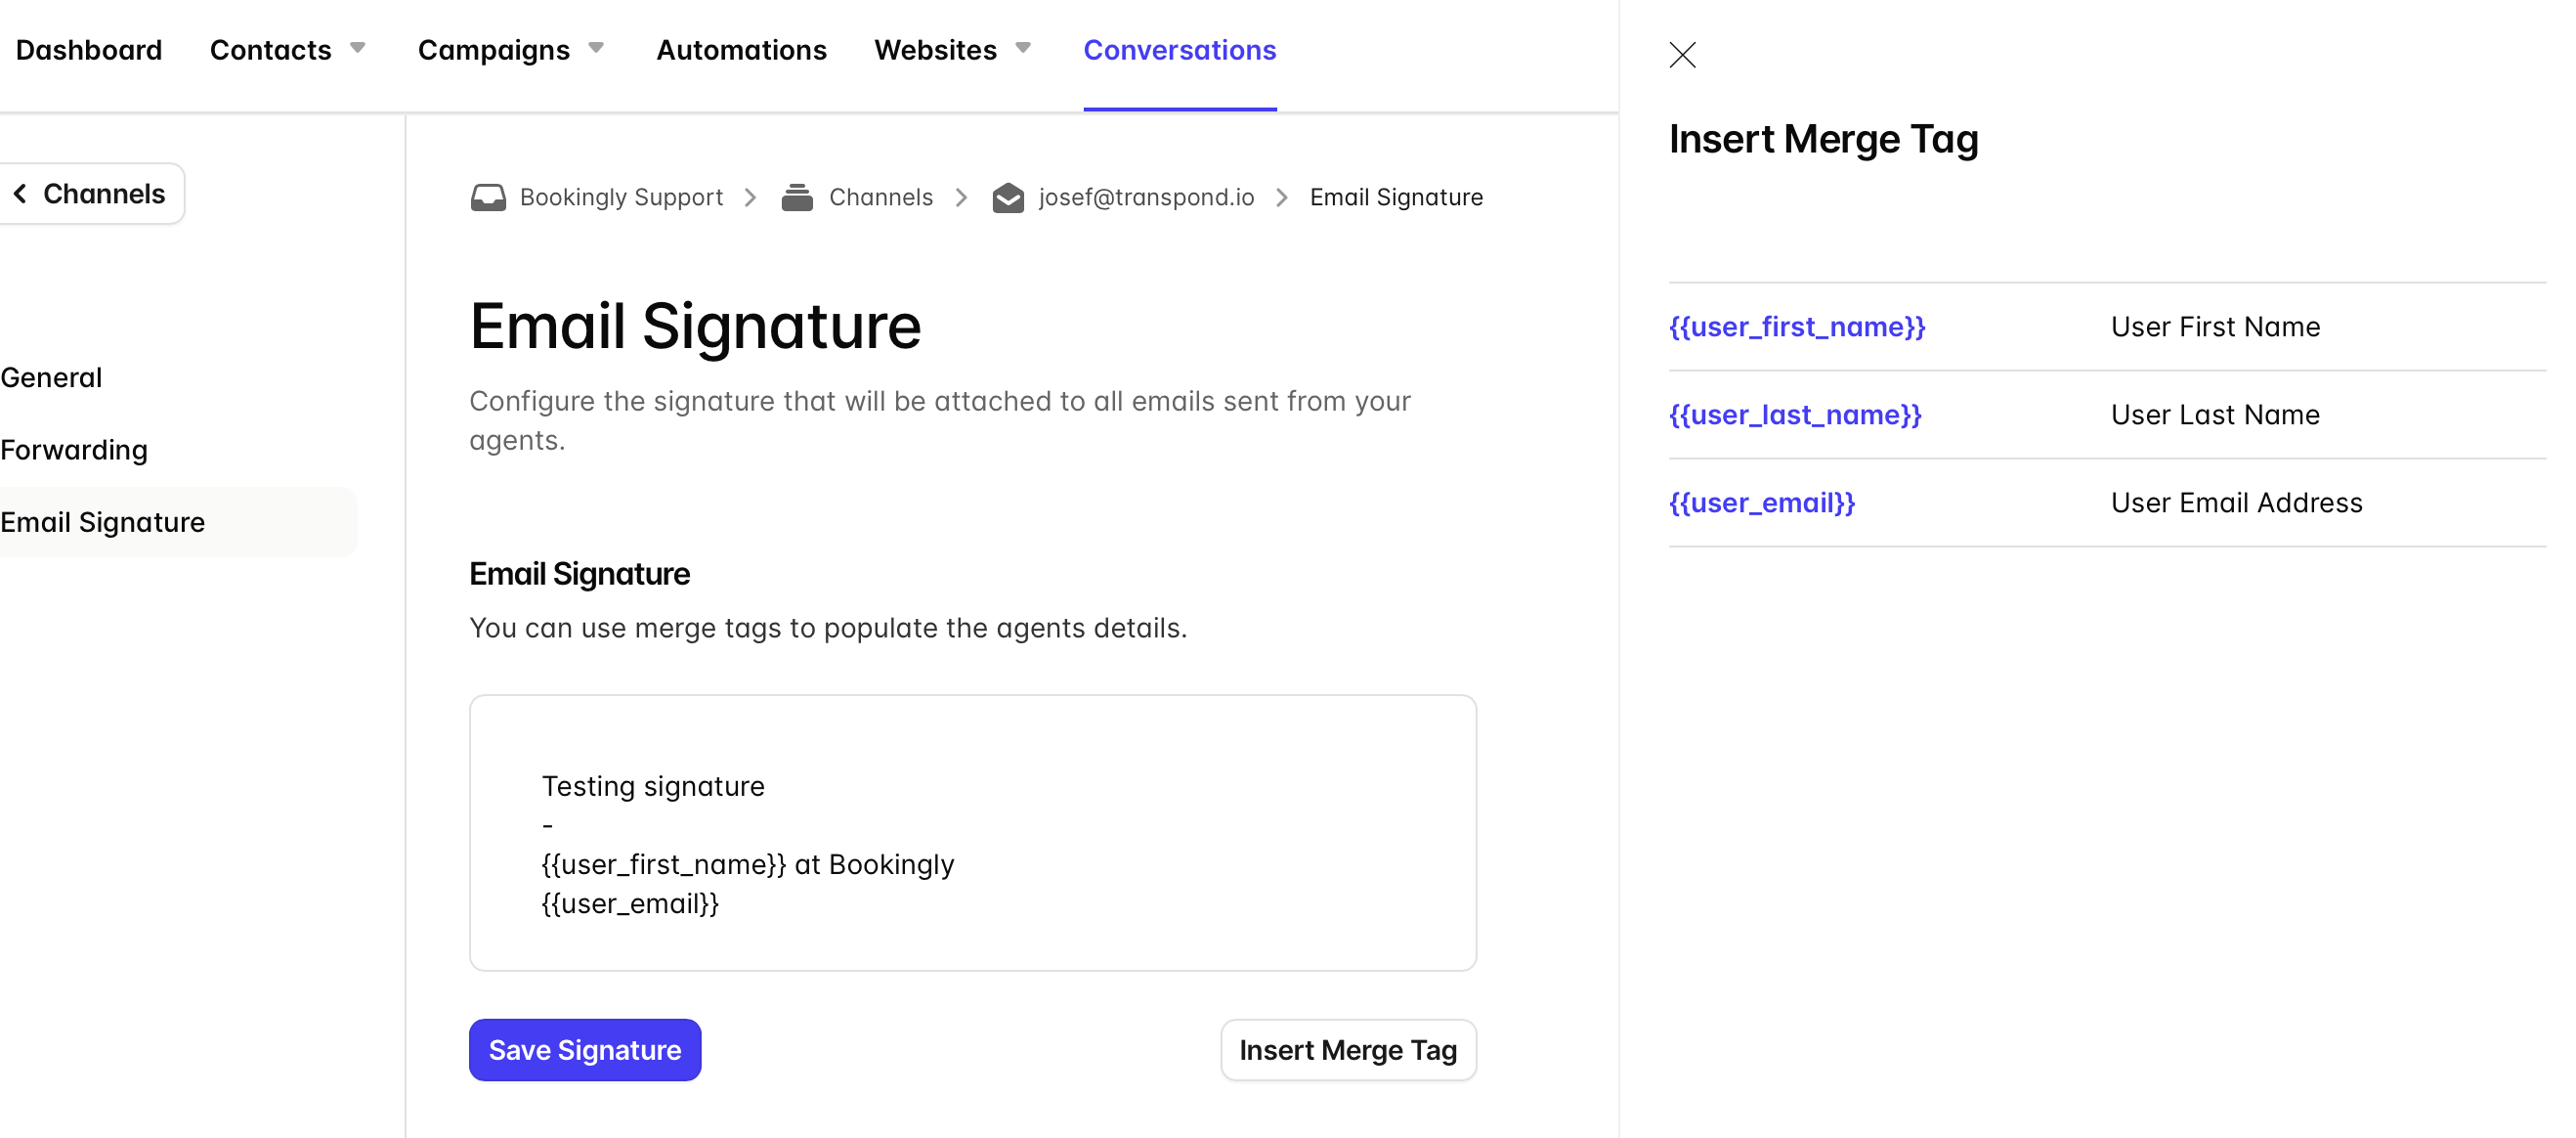
These settings help keep outgoing emails consistent across your team.
Configure your Chat Channel
Chat Channel settings control how your Chat widget and Facebook Messenger experience behave.
To configure a Chat Channel:
- Click your Inbox name
- Go to Channels
- Select your Chat or Facebook Messenger Channel
From here you can manage:
- Chat widget design
- Website visibility
- Prompts and welcome messages
- Agent availability
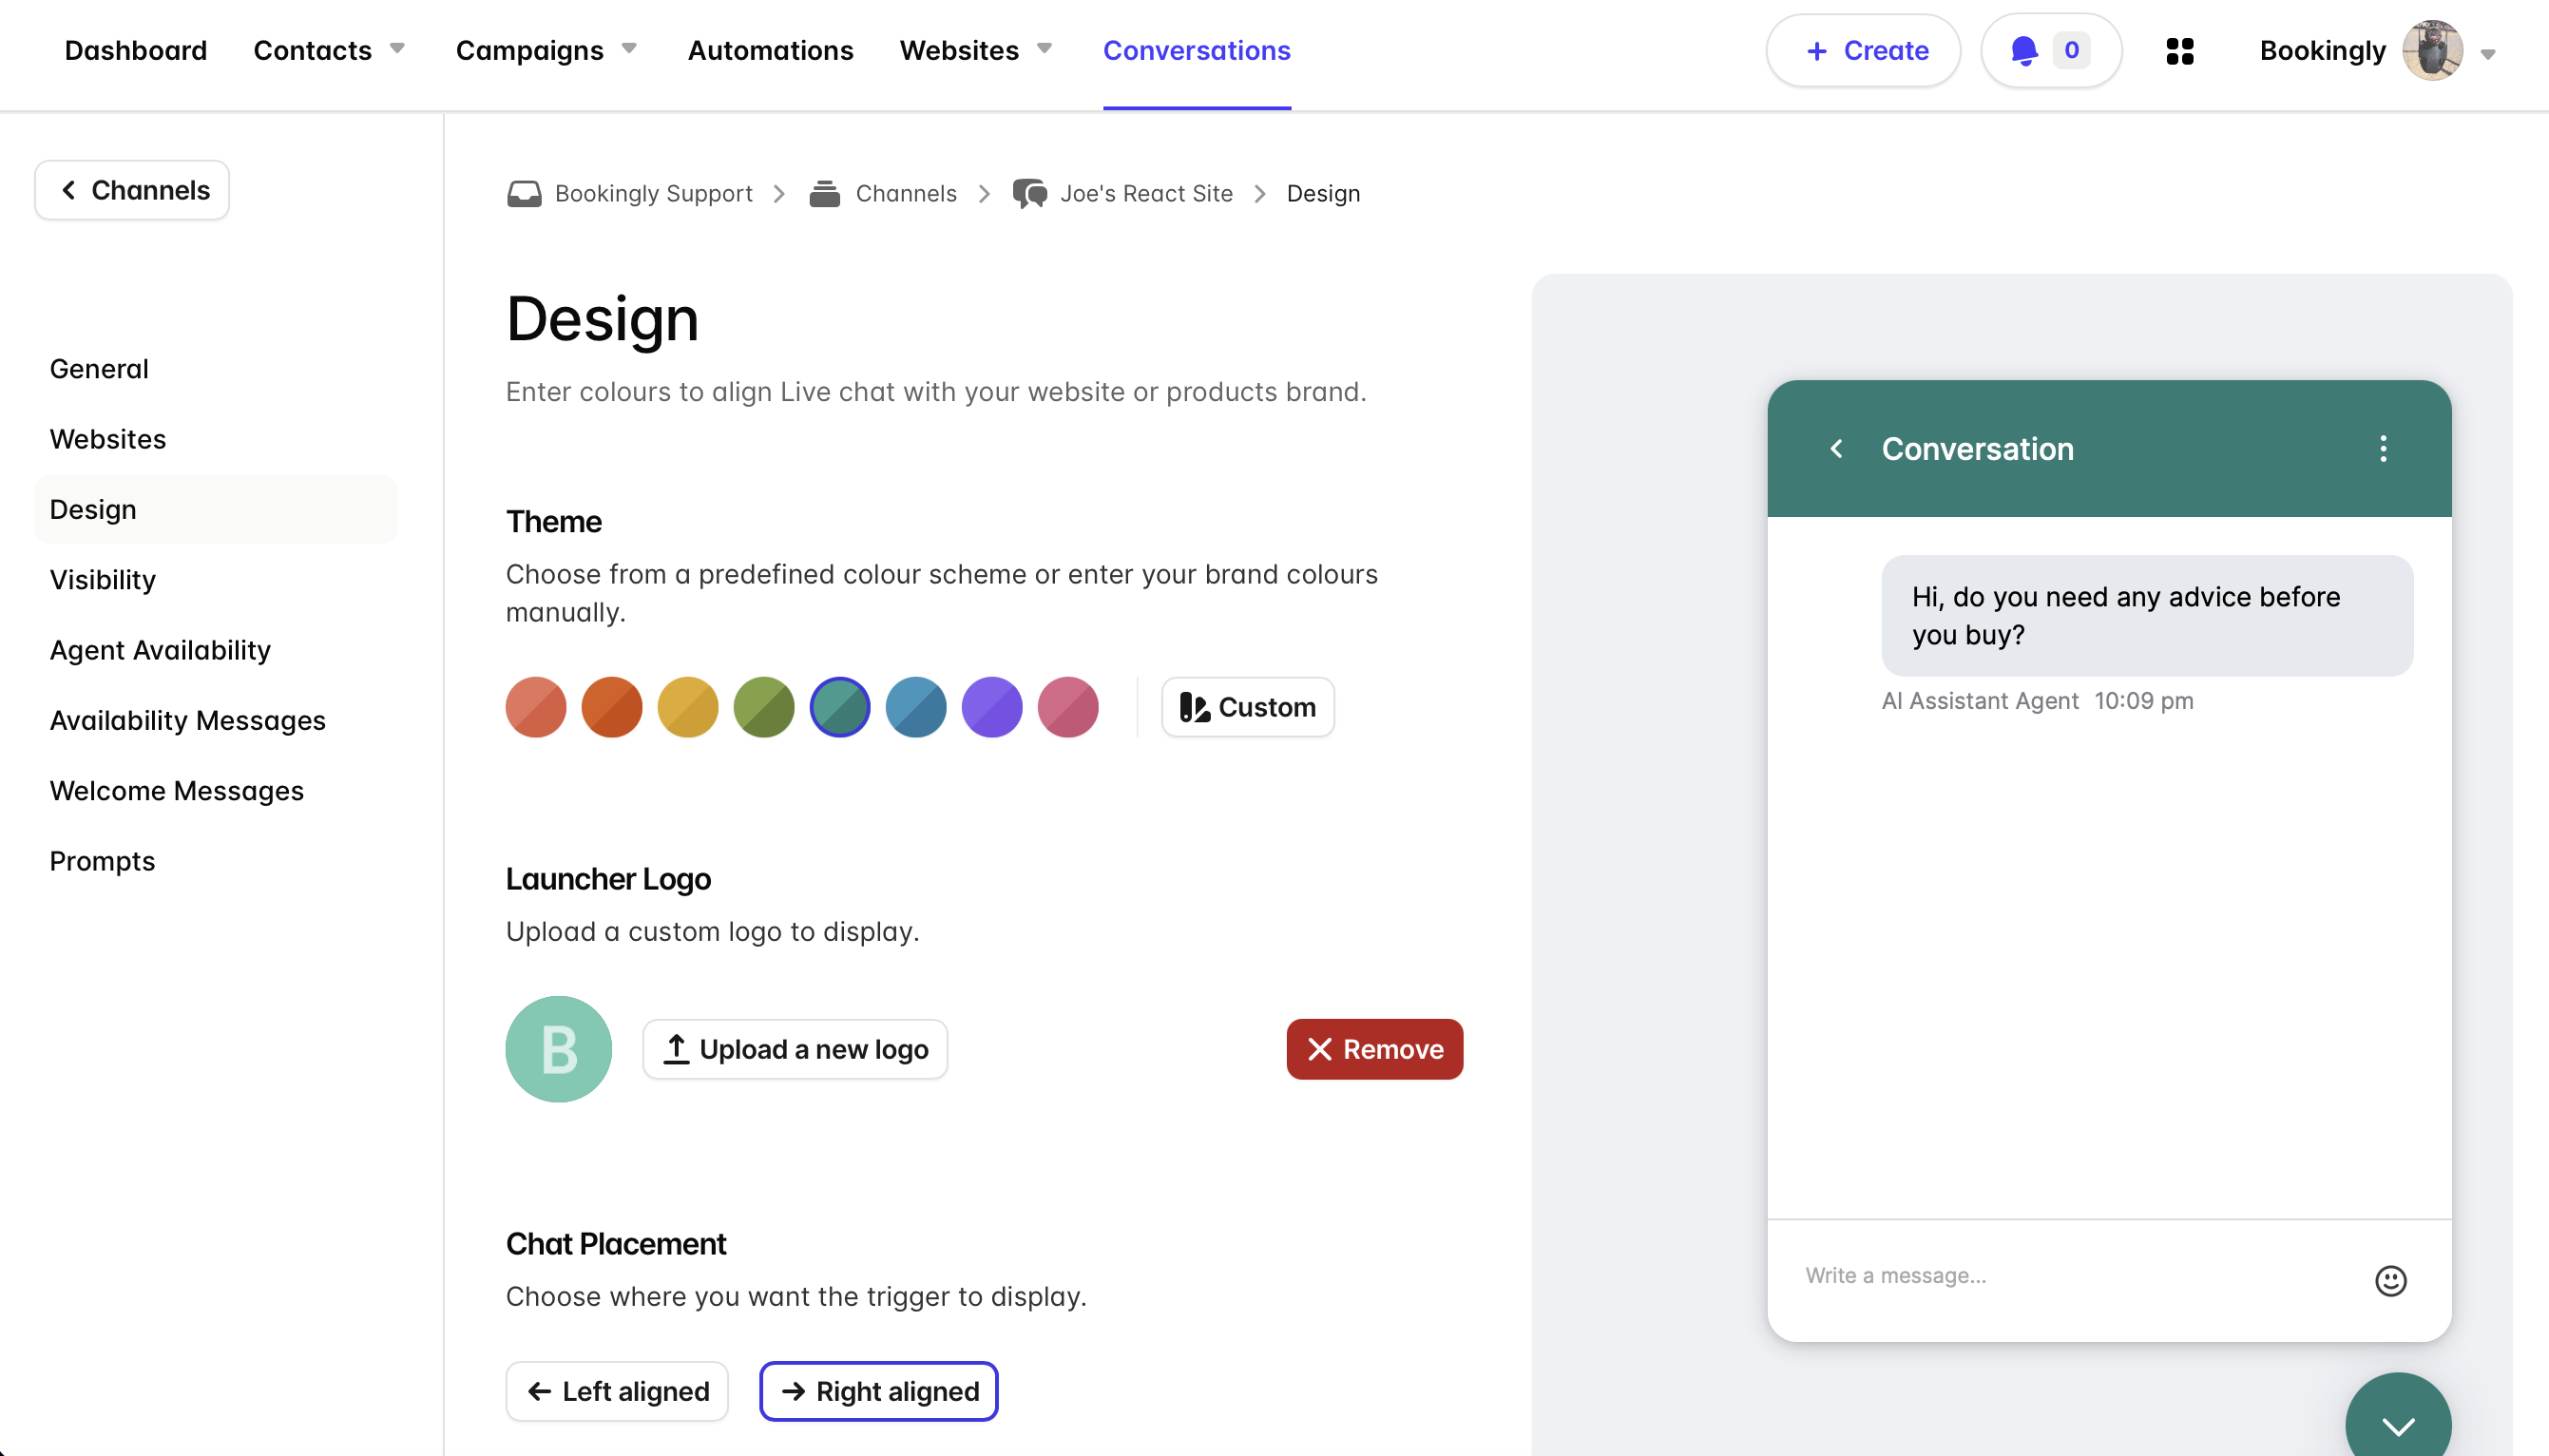
- Availability messages
For more detailed Chat customization steps, see the Customize Chat guide.
Manage Chat Agents
Each Transpond user can be assigned a Conversations role.
Available roles include:
- Admin – full access to Conversations settings and agents
- Agent – can view and reply to conversations
- Viewer – can view conversations only
To update Agent roles:
- Click your Inbox name
- Go to Agents
- Use the dropdown next to each user to select their role
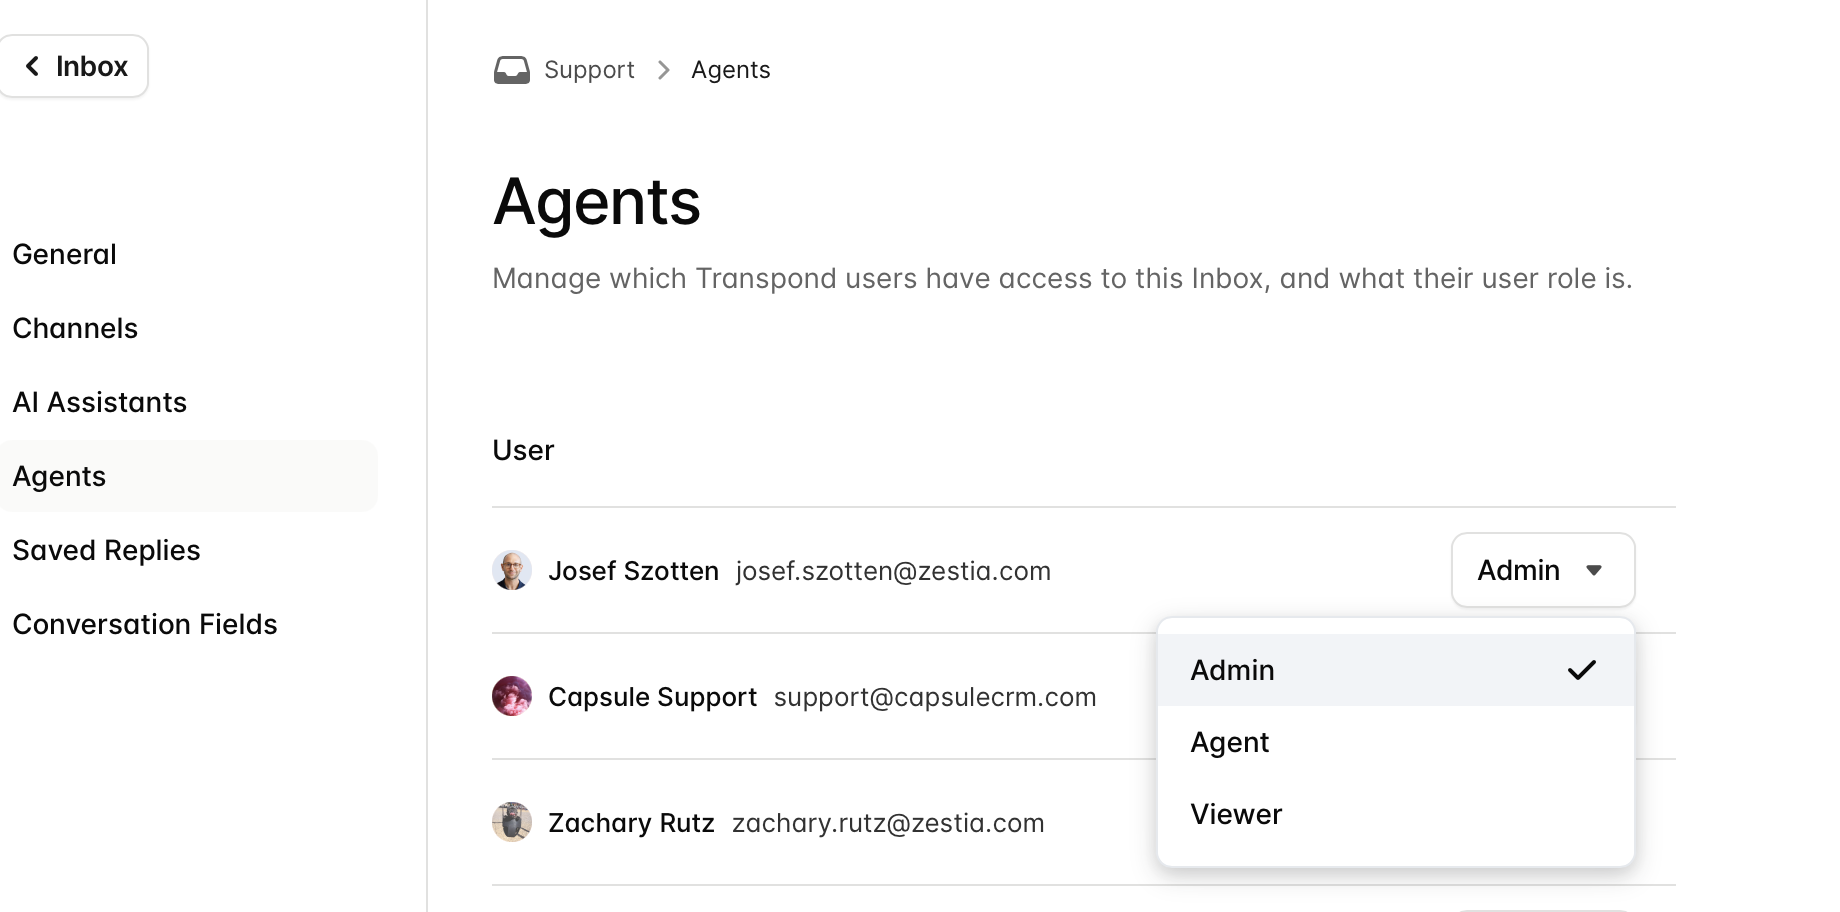
To add a new Agent, click Add New User and complete the standard Transpond user setup process.
Create and manage Saved Replies
Saved Replies help your team quickly respond to common questions using pre-written responses, saving valuable time for you and your team.
To create a Saved Reply:
- Click your Inbox name
- Go to Saved Replies
- Click + New Reply
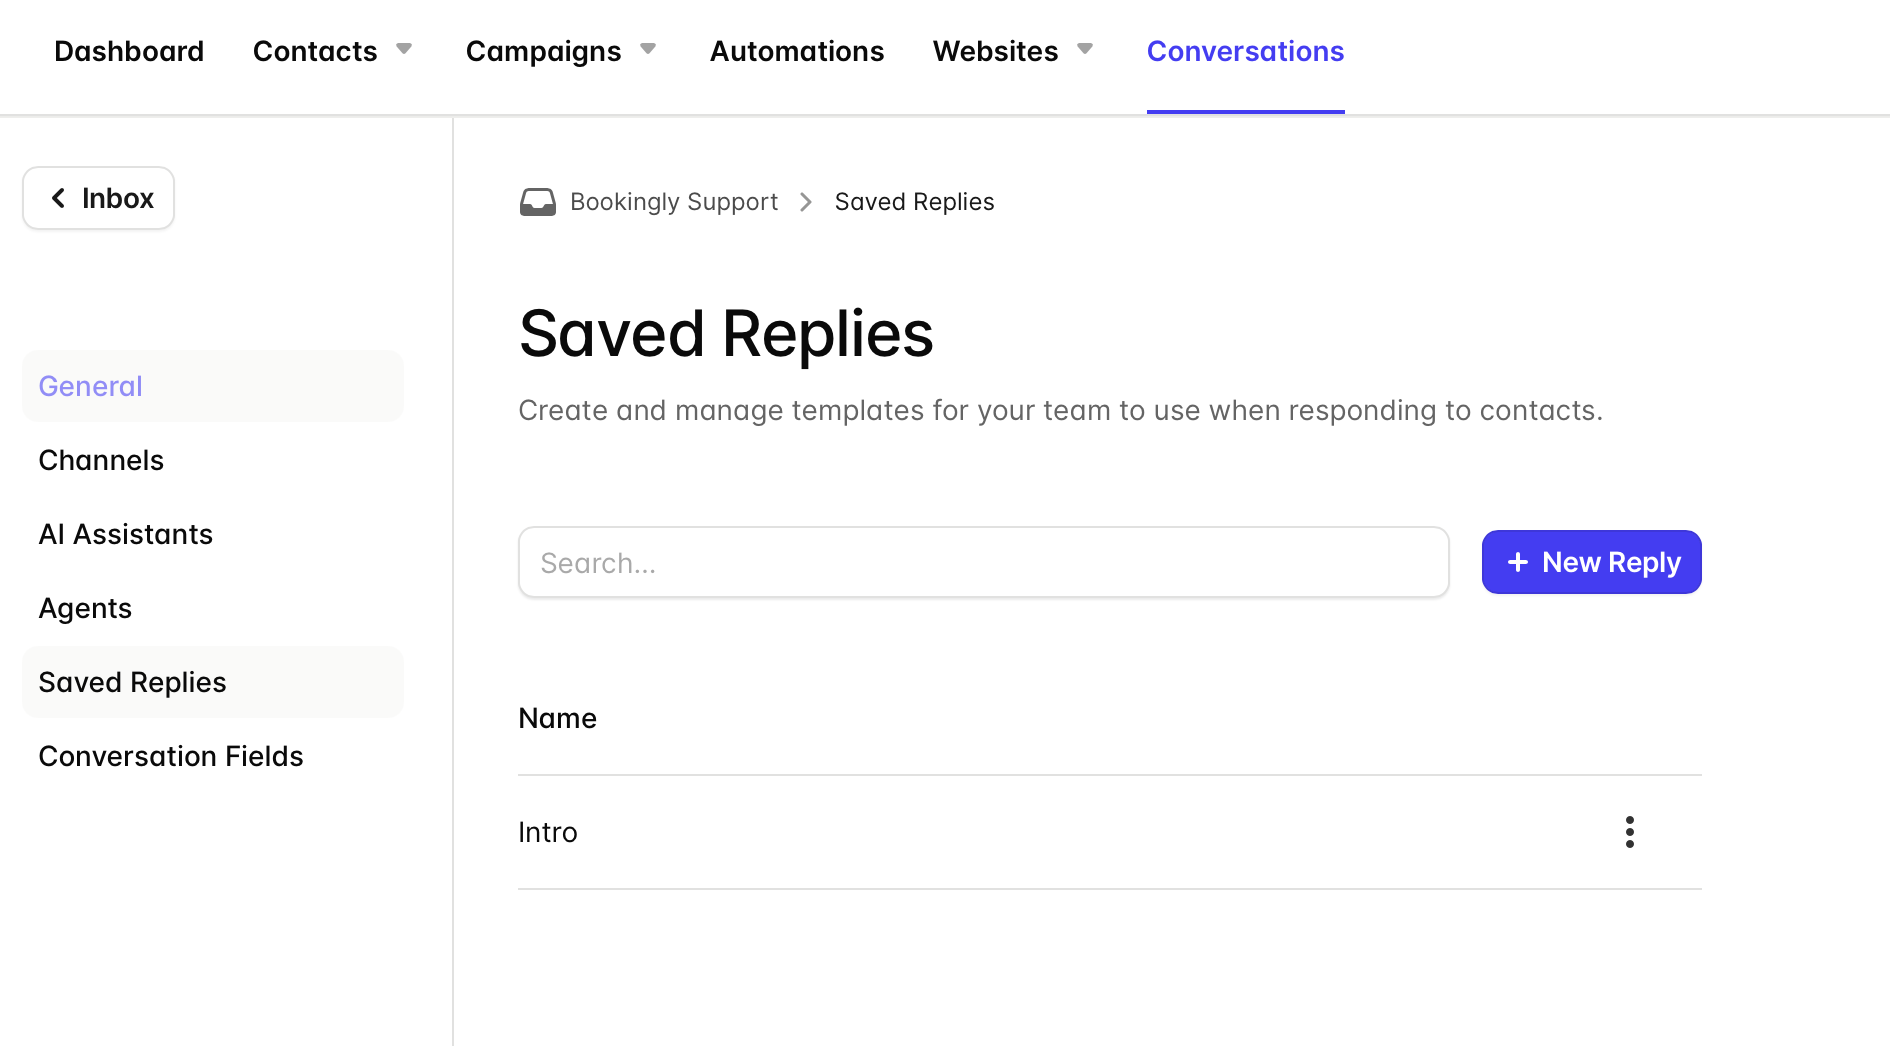
- Enter a title and reply content
- Click Add Reply
Saved Replies will then be available to all Agents in the Inbox.
To update a Saved Reply:
- Go to Saved Replies
- Select the Saved Reply you want to edit
- Update the content
- Click Update Reply
To delete a Saved Reply:
- Go to Saved Replies
- Click the three dots next to the Saved Reply
- Select Remove Saved Reply
Manage Conversation Fields
Conversation Fields let you store information that is specific to an individual conversation, rather than the contact record itself.
Examples might include:
- Conversation priority
- Product interest
- Internal notes
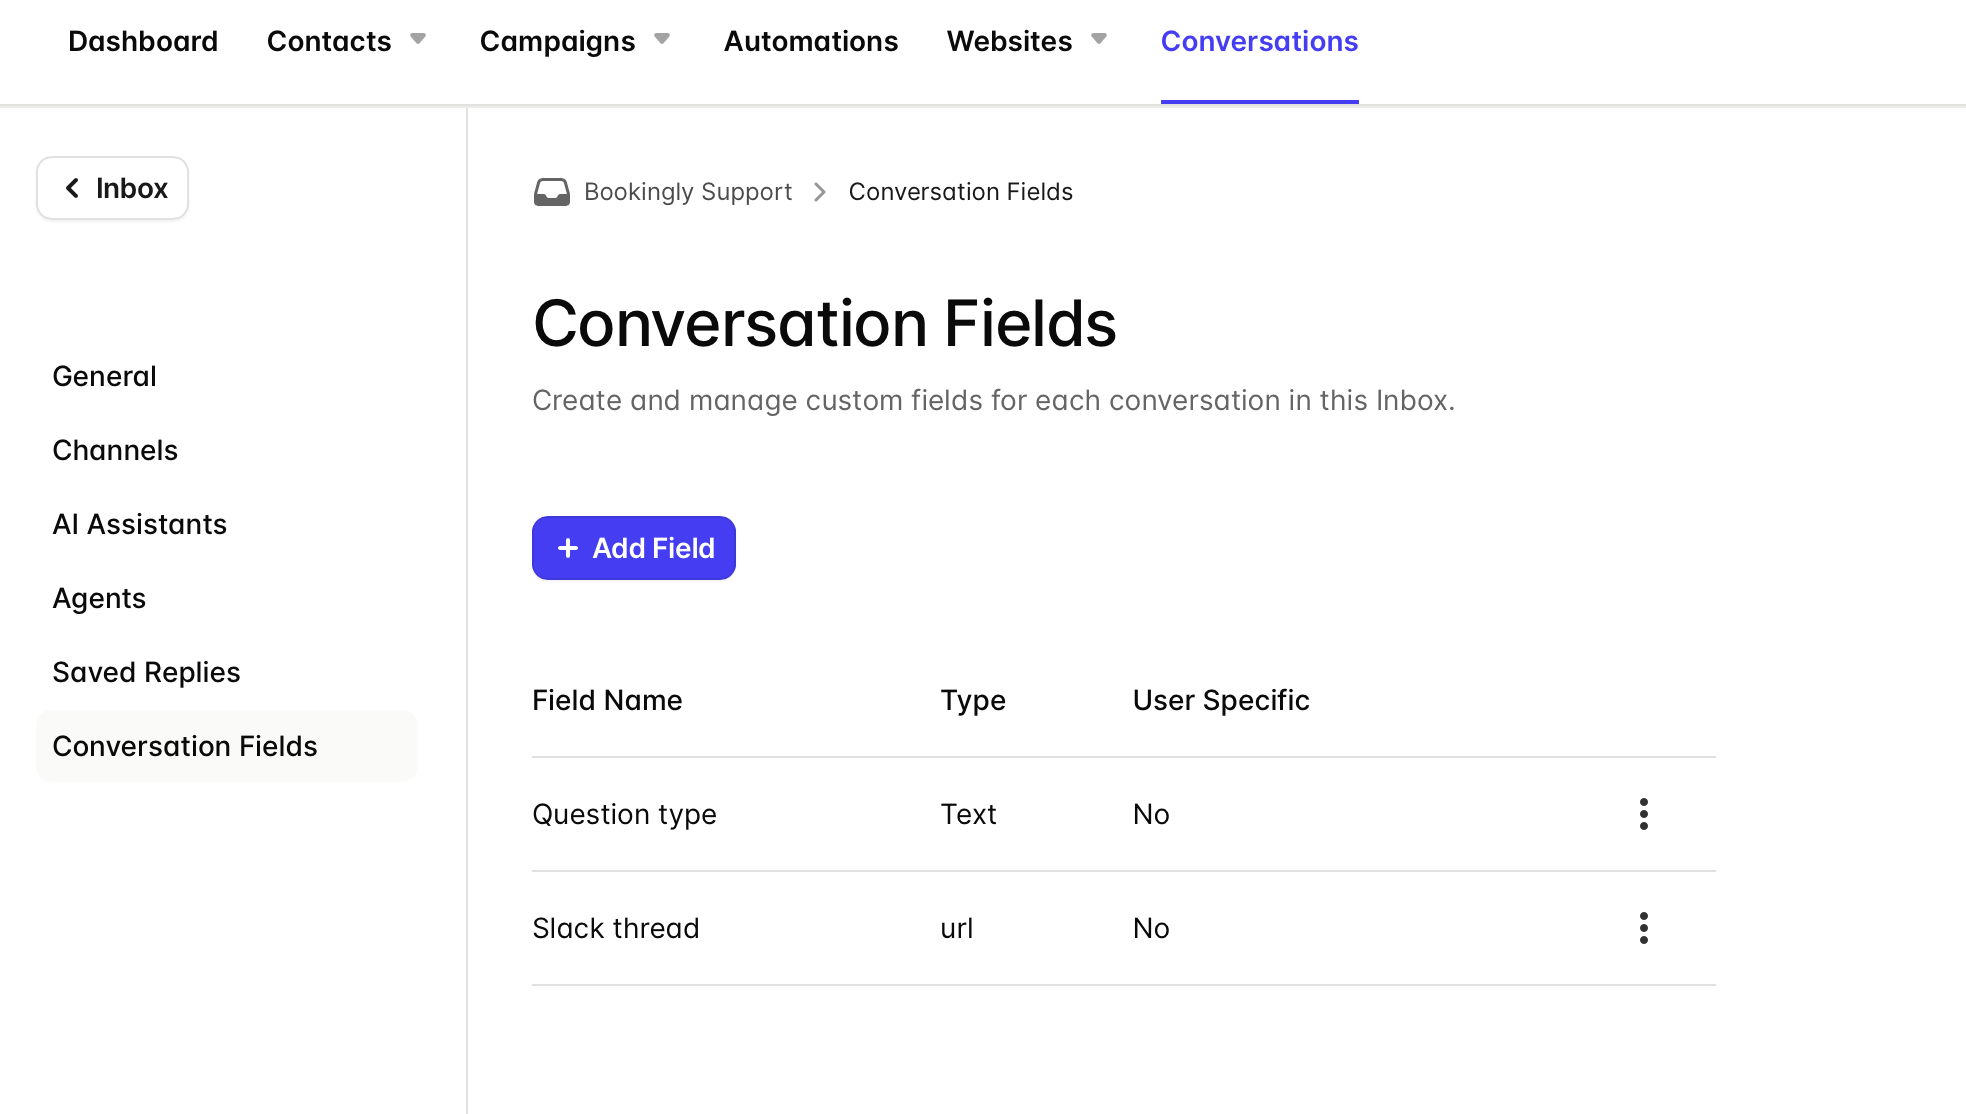
To create a Conversation Field:
- Click your Inbox name
- Go to Conversation Fields
- Click Add Field
- Enter a field name and select the field type
- If using a dropdown field, add the available options
- Configure whether the field should be Agent-specific
- Save the field
To edit or delete a Conversation Field:
- Go to Conversation Fields
- Click the three dots next to the field
- Choose Edit Field or Delete Field
Please note that existing field types cannot be changed after creation.